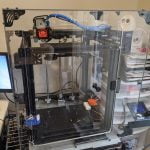
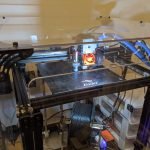
Recently the team over at 3DUpfitters.com sent us an Ender 5 enclosure for review. We told them we would conduct an honest review and take lots of pictures for an instructional how-to. Initially I was quite excited to get my hands on this thing. It seemed like a well-thought-out execution of an acrylic printer enclosure. Just like the type you would see on the high dollar 3D printers! Except it was made for my $300 Ender 5!
We have taken on just about every type of Ender 5 modification you can think of. So it was time to start looking into 3D printer enclosures to print ABS/ASA more efficiently. When you decide to start printing high grade polymers and nylons such as ABS, PA11, CoPA, it is almost a requirement to have an enclosure and proper venting. The guys over at 3DUpfitter’s have taken this into account and the system can accommodate everyone. From the Do It Yourself guru in their home, to a school lab, or even industrial settings where protocols are required. They offer add-ons such as ventilation piping and ductwork, fire suppression, temperature monitoring. Their support team reply to emails quite fast, something I find important when purchasing a product.
Shipping & Packaging
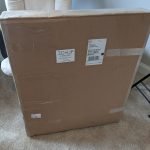
After receiving notification my order was accepted via email I was already antsy. I had to keep in mind this product is likely made to order. I was pleasantly surprised when I received an email within 24 hours that my order had been shipped! The client portal at 3DUpfitter’s website kept me informed on the tracking information, even alerting me the day of delivery. From the day of ordering to delivery was 6 days, pretty impressive in this post-covid craze.
The package arrived undamaged and probably could have withstood an IED or frag grenade had it needed to. The inside of the package had plenty of bubble cushion material, and the acrylic was protected by the vinyl wrapping.

Installation
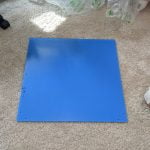
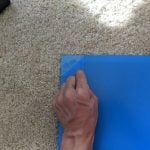
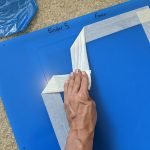
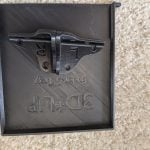
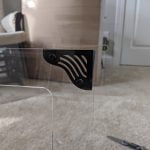
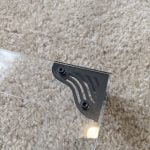
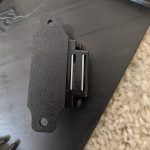
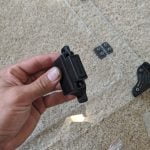
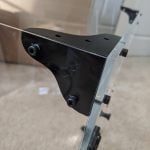
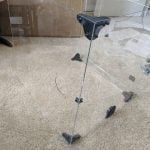
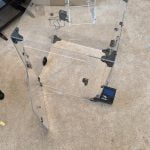
The initial setup of the enclosure was just a little bit cumbersome. Ensuring the corner brackets and acrylic panels are facing the correct way is the hardest part. While doing the setup, we took tons of pictures and even several short videos. Even with all of the wasted time, we still completed installation within 1 hour and 30 minutes.
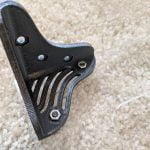
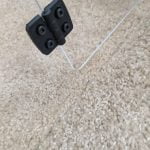
The main thing you need to be conscious about is the orientation of the corner brackets and holes in the panels. They will always have the decorative side facing outward to the user, and middle brackets are at the top of the panel. We made a single mistake during assembly on the right panel. After installing all the hardware on the right panel for the door and hinges I realized it. The middle bracket hole was at the bottom of the panel. I had to take all the hardware off the panel and flip it right-side up and re-install. Make sure your middle bracket holes are facing up before moving onto additional hardware.

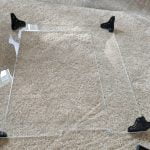
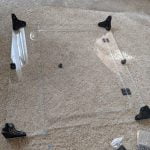


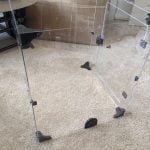
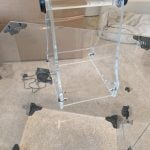


I highly recommend leaving everything only hand tight until you are completely done. Then ask for assistance or take your time ensuring each panel is sealing to the adjacent panel properly for an airtight fit. The best way to get the doors aligned properly on your first try is to leave them loose. Then close them and align with the hole in the panel. After ensuring everything looks good open the opposite door and tighten the bolts and nuts. This method will allow you to align the door in the hole it was cut from.
Print Quality Improvements
The one thing everyone always wants to know is “did it improve print quality”. The answer is YES, and some materials more than others. I print with all types of material, and my printer generally runs 24/7 in the lab. We are not only making parts for clients and friends. When the printer is not making us some side-cash, we produce our own prototype parts. I have experimented with several different materials that generally require an enclosure, and the main one being ABS and ASA.
We prefer printing structural parts or anything for automotive or outdoors in an ABS plastic. Due to the thermal and strength properties it’s the clear choice. The big issue when printing ABS on an Ender 5, or any other printer which does not come with an enclosure is warping. If you are 3D printing near a draft, ABS prints will almost always warp off the build plate at the corners. With an enclosure you are preventing these drafts from reaching the top of the build plate. Also you are maintaining a temperature sufficient enough to prevent ABS warping. This also applies to other materials such as Nylon, PC, ASA and likely many more industrial grade polymers.
During our testing we monitored the internal temperatures with a probe. With the heated bed set at 110* Celsius we were able to easily maintain a chamber temperature of 60* to 70* Celsius. This is the ideal temperature for printing ABS. It results in low residual stress and in our case nearly perfect prints with no warping or cracking! I have grown to become really fond of the print quality and strength of ABS and ASA filaments. Now that I can print inside of an enclosure, you can just feel the difference in strength in quality of the part.
Print Contamination
My office is also often visited by our 100 pound long hair German Shepherd. That generally leads to lots of dust and hair in the room. We often see little specs of contamination in our 3D models. Of course that requires more work in post-processing. The 3DUpfitter’s enclosure prevents outside contaminants from reaching the model. Alternatively it aids in keeping the surfaces of your printer cleaner. Who want’s to do more post-process work on the model after waiting for hours? Not me.
Cost vs DIY
Many people who will be reading this blog will likely be a little skeptical to spend $299 on the Ender 5 Enclosure. But if you begin to look at how much the materials cost to build an acrylic enclosure of this size, you will likely think twice. I started to price out the panels after looking at 3DUpfitters.com. Then I realized the materials are quite expensive and come in large sheets that are cumbersome to get home. The costs don’t stop at just the acrylic either. You have to buy enough hardware of the proper size to fit together all of the panels. Most DIY enclosures also require some 3D printed parts for the corner pieces. This will not only cost you lots of money, but you will spend hours planning. Considering the size of the printer is a large factor in the overall price.
In theory it may save you several dollars to build the 3D Printer Enclosure DIY. Although it will likely not be near as nice as this finished product. 3DUpfitter’s have sold hundreds of these enclosures to entities such as schools, businesses and others who need it for the added safety and quality. It’s not everyday that we as hobbyist have the opportunity to purchase the same products as these institutions and at a price that we feel is fair.
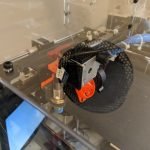
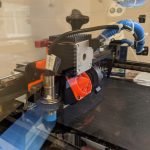
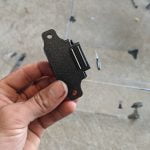
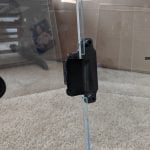
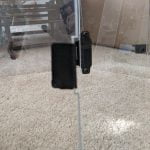
Direct Drive Modifications
If you are using a direct drive extruder like we do on our Ender 5 in the lab, you will need to make several modifications to your setup. We are using the PrinterMods Direct Drive kit from our Top 5 Mods post. It required us to drill a hole in the top panel and thread in a Bowden connector. We then routed PTFE tube from our spool holder to the extruder entrance. Ensuring there was enough slack to reach all four corners of the printer without excessive tension.

You will also need to move your wiring tie-down mount on the X axis cover. From the right-hand side like shown in the installation, to the back side of the cover. This change will get the wiring out of the path of the door hinge bolts and nuts. Eliminating the change of hanging up on the door hardware. I also decided to place an extra zip-tie here to keep them pulled away from the edge.
Conclusion
Overall I would say without a doubt the 3DUpfitter’s Enclosure improves the print quality of all 3D Printed models, and there are many different improvements that I haven’t even realized yet! If you plan to print industrial grade polymers, or even upgrade to making functional parts with ABS/ASA; you really need one of these enclosures! The only piece of this kit that I was slightly disappointed by was the spool holder. I would like to see it upgraded to something on some cheap bearings like the Filler.

The conclusion of this review is simple, we suggest anyone who is looking for a 3D printer enclosure to visit https://3dupfitters.com today! If you have any questions or concerns don’t hesitate to contact their support. Emails are consistent and speedy replies are the norm, making this a business we trust.